
You don’t need a million-dollar studio to produce incredible-sounding music. Gone are the days of needing massive mixing consoles and racks of outboard gear. Today, the power to create a professional mix sits right on your desk. With a decent computer and the right software, you have everything you need to get started. The real magic isn’t in the expensive equipment; it’s in the knowledge. This guide will walk you through the fundamental techniques of how to mix music on your computer, proving that you can achieve a polished, release-ready sound without breaking the bank.
Key Takeaways
- Set yourself up for success before you mix: A great mix starts with a clean workspace. Before touching any faders, organize your audio files into dedicated folders and configure your audio settings to prevent technical issues and streamline your creative process.
- Master the core mixing techniques: A professional-sounding track relies on three key skills: using EQ to create clarity, applying compression for punch and consistency, and using panning and reverb to build a sense of space and depth.
- Finish your mix with confidence: To know when your track is truly done, test it on different playback systems like car stereos and earbuds, and compare it to professional reference songs. This ensures your music sounds great for every listener, not just in your studio.
Your Music Mixing Toolkit
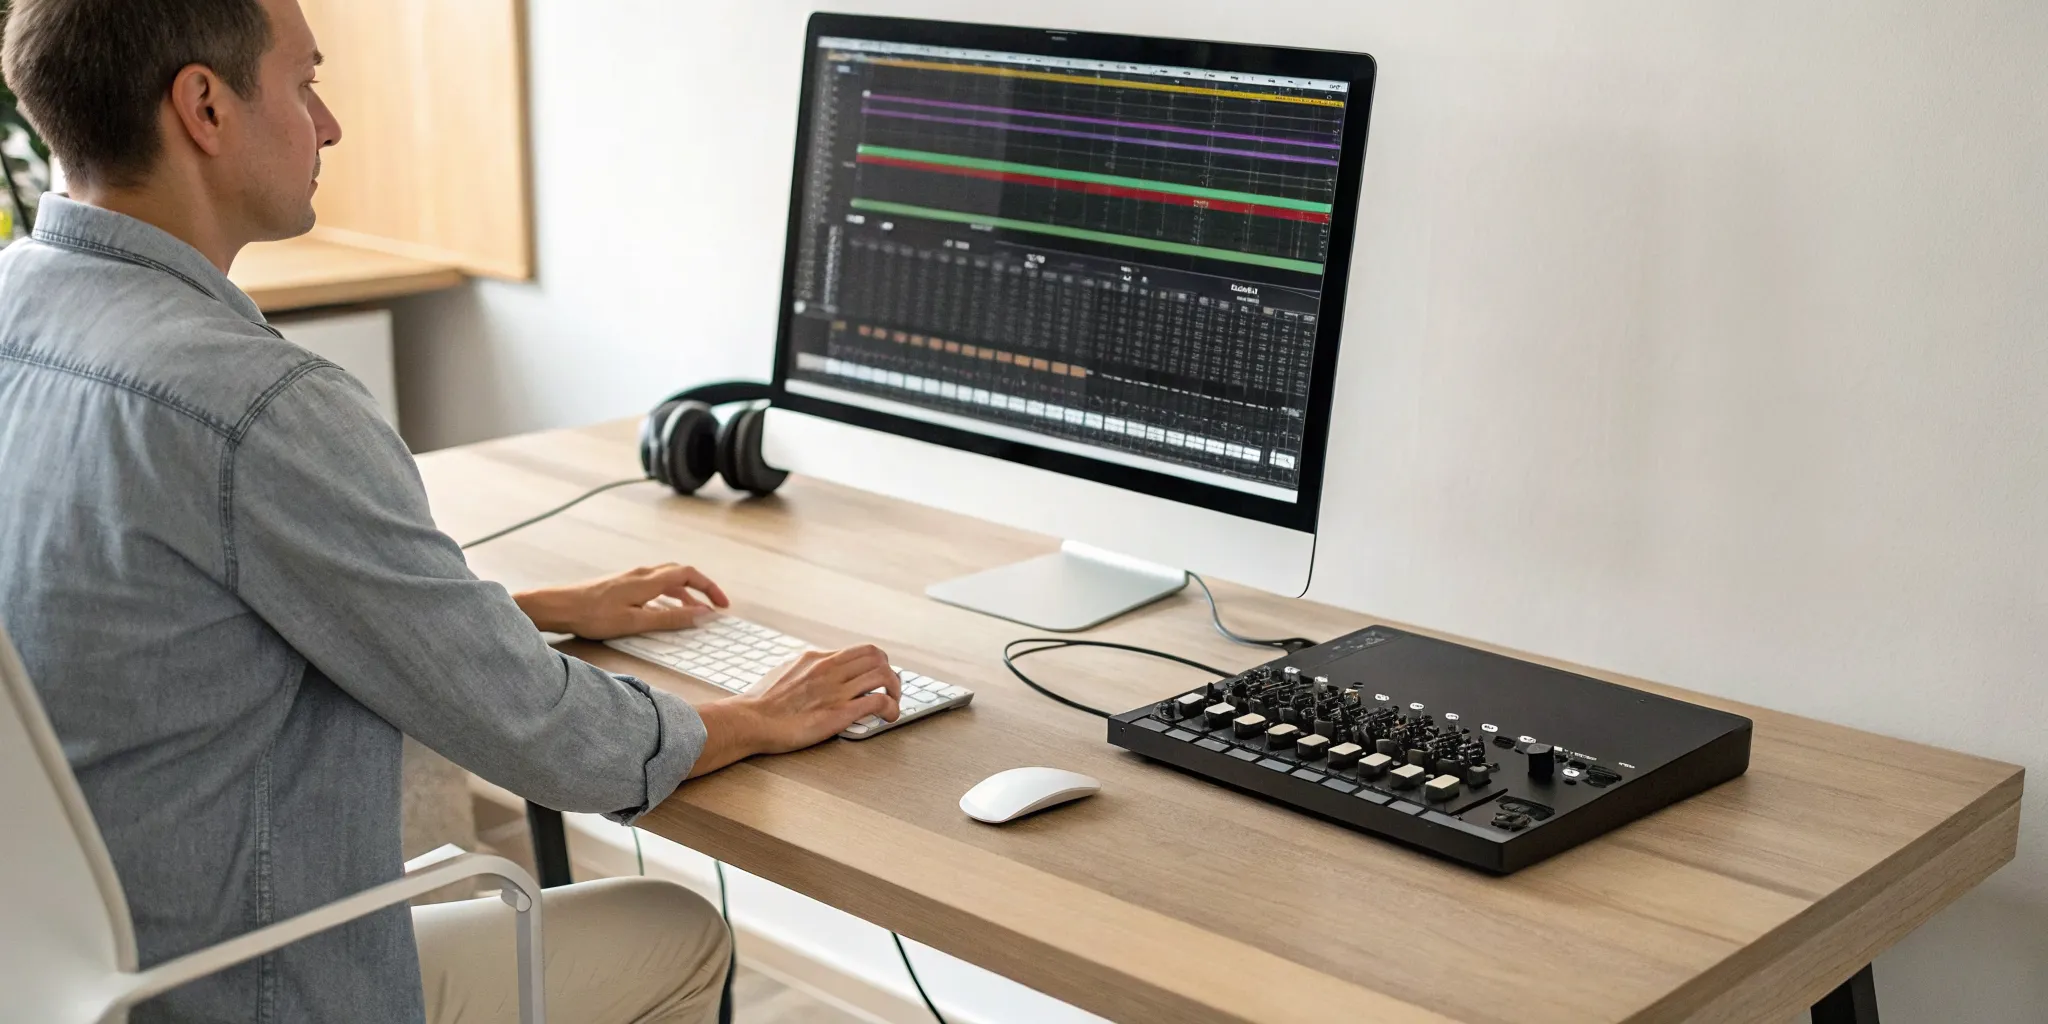
Before you can start blending tracks, you need the right tools for the job. The good news is that you don’t have to spend a fortune to build a solid setup. You can start mixing music with just your computer and some free software. As you grow, you can add hardware that fits your style and budget. Let’s walk through the essential software and hardware you’ll need to get started.
Free Music Mixing Software
Your Digital Audio Workstation, or DAW, is the software at the heart of your mixing setup. For beginners, there are some fantastic free options that are powerful enough to create professional-sounding mixes. Mixxx is a popular choice because it’s completely free, open-source, and works on Windows, macOS, and Linux. It has all the core features you need to start DJing right away. Another great tool is Rekordbox. While it has paid tiers, its free version is incredibly robust and helps you get comfortable with a layout that’s standard on professional club gear, making it a smart choice if you have long-term DJing goals.
Essential Home Studio Hardware
While you can start with just a laptop, having the right hardware makes the process smoother and more intuitive. Your computer is the engine of your studio, so it needs enough power to handle the software without crashing. Aim for a laptop with at least an Intel Core i5, AMD Ryzen 5, or an Apple M-series chip. If you can, an i7 or Ryzen 7 will give you even better performance. As you get more comfortable, adding a DJ controller can give you a more hands-on feel. Many controllers are designed to work seamlessly with software like Mixxx, giving you physical knobs and faders to manipulate your sound.
Computer and Audio Setup
A clean and organized setup will save you a lot of headaches. First, make sure your music files are neatly arranged in folders on your computer before you import them into your software. This simple step makes finding the right track mid-set much easier. For better sound quality, consider using an external sound card or an audio interface instead of your computer’s built-in headphone jack. You’ll also want a good pair of headphones and a splitter cable. This lets you pre-cue the next track in your headphones without the audience hearing it, which is a fundamental skill for seamless transitions.
What Is Music Mixing and Why Does It Matter?
Think of your recorded song as a collection of individual ingredients: vocals, drums, bass, guitars, and synths. Music mixing is the art of blending all those separate audio tracks together into one cohesive and polished final product. When you mix music on a computer, you’re using software to adjust levels, edit sounds, and make sure every element has its own space to shine. It’s the crucial step that transforms a rough demo into a professional-sounding song that can capture a listener’s attention and stand up against other tracks on a playlist.
Why does it matter so much? A great mix ensures your song sounds clear, balanced, and emotionally impactful. It’s what makes the vocals sit perfectly on top of the instruments, the kick drum punch through without overpowering everything, and the subtle background details audible. Without a proper mix, your track might sound muddy, cluttered, or just plain flat. The bass could drown out the vocals, or the cymbals might sound harsh and distracting. For any artist hoping to get their music heard, a solid mix is non-negotiable. It’s the key to making your creative vision come to life and connect with listeners on a deeper level, ensuring your hard work in writing and recording truly pays off.
The Goal of a Good Mix
The ultimate goal of mixing is to create a balanced and cohesive sound that serves the song and enhances its emotional core. It’s not just about making everything loud; it’s about making everything fit together perfectly. A good mix guides the listener’s ear, highlighting the most important parts of the song while ensuring every instrument contributes to the overall vibe. This involves carefully adjusting volume levels, panning tracks to create a wide stereo image, and using effects like EQ and compression to shape each sound. When you’re done, no single element should feel out of place. Instead, the entire track should feel like a unified piece that sounds great from start to finish.
Mixing vs. Mastering: What’s the Difference?
It’s easy to confuse mixing and mastering, but they are two distinct stages of music production. Mixing is the process of taking all the individual tracks (your multitrack recording) and blending them into a single stereo file. This is where you balance levels, pan instruments, and add creative effects. Think of it as painting a picture, carefully placing each color and shape on the canvas.
Mastering is the final step. It takes that single mixed file and prepares it for distribution. This involves polishing the overall sound, ensuring consistent volume levels, and optimizing the track to sound its best across all playback systems, from earbuds to car stereos. If mixing is painting the picture, mastering is putting it in the perfect frame and under the right gallery lighting before you present it to the world through music submission.
How to Set Up Your Computer for Mixing
Before you even think about touching an EQ or compressor, you need to get your digital workspace in order. A solid setup is the foundation of a great mix. It ensures your computer can handle the demands of audio processing and helps you stay organized, which saves a ton of headaches down the road. Taking a few minutes to configure your settings and arrange your files will make the entire mixing process smoother and more creative.
Configure Your Audio Drivers and Settings
Getting your audio settings right is a game-changer for sound quality and performance. Your computer’s built-in sound card is fine for everyday listening, but for mixing, you’ll get much better results with a dedicated audio interface. This external hardware handles all the sound processing, reducing lag and giving you a cleaner signal. Once you have one, make sure your mixing software is set to use its specific audio drivers. This simple step ensures you’re hearing everything as accurately as possible, which is essential for making good mixing decisions.
Organize Your Workspace and Files
A clean workspace isn’t just for your desk; it’s for your hard drive, too. Before you import a single track, create a clear folder system for your projects. I recommend a main project folder with subfolders inside for “Audio Files,” “Bounces,” and “Project Files.” This simple habit prevents your software from losing track of files and makes finding what you need effortless. When you organize your music files from the start, you can focus on the creative parts of mixing instead of searching for a missing drum sample. Trust me, your future self will thank you.
How to Mix Your First Song: A Step-by-Step Guide
Alright, you’ve recorded all your tracks and now you’re staring at a screen full of audio files. What’s next? It’s time to mix. Mixing is where the magic happens; it’s the process of taking all your individual recordings and blending them into a single, cohesive song. Think of it like cooking: you have all your ingredients (the instruments and vocals), and now you need to combine them in just the right amounts to create a delicious final dish. This is your chance to make sure the drums hit hard, the vocals sit perfectly on top, and every instrument has its own space to shine.
Don’t let the technical side intimidate you. At its core, mixing is a creative process guided by your ears. The goal is to create a balanced, clear, and emotionally impactful listening experience. Following a structured process can help you stay focused and avoid feeling overwhelmed. We’ll walk through the fundamental steps, from organizing your project to adding those final polishing effects. Once you’re done, you’ll have a track ready to share with the world, and maybe even send it over through our music submission portal. Let’s get started.
Step 1: Import and Organize Your Tracks
Before you touch a single fader, get your session in order. A clean workspace sets you up for a smoother mixing process. Start by importing all your audio files, or “stems,” into your music software. Once they’re loaded, take a few minutes to label everything clearly. Rename “Audio_01_final_take” to “Lead Vocal” and “Inst_03” to “Rhythm Guitar.” Color-code your tracks by instrument group, for example, all drum tracks are blue, guitars are green, and vocals are red. This simple visual organization will save you a ton of time later when you’re trying to find a specific sound in a project with dozens of tracks.
Step 2: Set Levels for a Rough Mix
With everything organized, it’s time to create a basic, or “rough,” mix. The goal here is simply to get a general volume balance between all your tracks. Bring all the faders down to zero, then start bringing them up one by one, beginning with the most important element, which is often the lead vocal or the main drum beat. Adjust the volume of each track until you can hear everything clearly without any single element overpowering the others. Don’t worry about effects or perfection at this stage; you’re just building the foundation for the rest of your mix.
Step 3: Shape Your Sound with EQ
Equalization, or EQ, is your primary tool for shaping the tone of each instrument and making sure they fit together. Think of EQ as a sophisticated set of bass and treble controls. Every sound has a specific range of frequencies, and EQ allows you to cut or add to those frequencies. For example, if your bass guitar and kick drum are fighting for the same low-end space, you can use EQ to carve out a little room in one to make space for the other. This helps reduce “muddiness” and gives each instrument its own defined spot in the mix, resulting in a clearer, more professional sound.
Step 4: Add Punch with Compression
Compression is one of the most powerful tools in mixing, but it can be tricky to understand at first. In simple terms, a compressor reduces the dynamic range of a track, which is the difference between its loudest and quietest parts. By making the loud parts a bit quieter and the quiet parts a bit louder, compression creates a more consistent and controlled sound. This can help a vocal sit steadily in the mix without getting lost, or it can give a snare drum more impact and “punch.” Used correctly, compression adds energy and polish to your tracks.
Step 5: Create Space with Panning
Your song exists in a stereo field, meaning you can place sounds to the left, to the right, or in the center. This is called panning. Panning is essential for creating a sense of width and space in your mix. Instead of having every instrument stacked up in the middle, you can spread them out. For instance, you might keep the kick drum, bass, and lead vocal in the center to anchor the track, while panning rhythm guitars or background vocals to opposite sides. This technique opens up the mix, prevents instruments from clashing, and creates a more immersive listening experience for your audience.
Step 6: Add Depth with Reverb and Effects
Now for the fun part: adding effects like reverb and delay. These tools help you create a sense of depth and place your instruments in a virtual space. Reverb simulates the sound of a physical room, from a small, tight studio to a vast concert hall. Adding a touch of reverb can make a dry vocal sound more natural and help it blend with the other instruments. Delay, which is essentially an echo effect, can be used to add rhythmic excitement or a dreamy atmosphere. These final touches are what give a mix its unique character and vibe, much like the tracks from our featured artists.
Essential Beginner Mixing Techniques
Once you have a rough balance of your tracks, you can start refining your mix with a few core techniques. Don’t feel overwhelmed by all the plugins and knobs available. At its heart, a great mix comes down to mastering three fundamental concepts: balancing frequencies, controlling dynamics, and creating a sense of space. Think of these as your primary tools for taking a collection of individual recordings and making them sound like a cohesive, professional song. When you listen to the polished tracks from your favorite independent artists, you’re hearing these principles in action. Let’s break down how you can achieve that with your own music.
Balance Frequencies with EQ
Think of your mix as a sonic puzzle where every instrument needs its own spot. Equalization, or EQ, is the tool you use to carve out that space. Every sound is made up of low, mid, and high frequencies, and sometimes, these frequencies clash. For example, the low-end of a guitar might interfere with the bassline, making the mix sound muddy.
A good approach to equalization is to make small cuts to frequencies that are masking other instruments. If a vocal sounds unclear, you might try reducing the frequencies around 400 Hz to remove some boxiness. By gently shaping each track with EQ, you ensure every element can be heard clearly, resulting in a cleaner and more professional mix.
Control Dynamics with Compression
Have you ever noticed how in a professional song, the vocal stays at a consistent level, never getting too quiet or too loud? That’s the magic of compression. A compressor is a tool that automatically turns down the loudest parts of a sound and turns up the quietest parts. This evens out the performance and helps it sit perfectly in the mix.
Using compression is essential for controlling the dynamics of your track. It can make a kick drum punchier, a bassline feel more solid, and a vocal sound more present and polished. By taming the volume peaks, you can bring up the overall level of a track without it sounding harsh or distorted, giving your mix a tight, cohesive feel.
Create Width and Depth
A great mix feels three-dimensional. It has width from left to right and depth from front to back. You can create this sense of space using panning, reverb, and delay. Panning is the simplest way to create width; by placing instruments in different spots across the stereo field (left, right, or center), you open up the mix and give each element its own location.
To add depth, use effects like reverb and delay. Reverb simulates the sound of a physical space, like a hall or a small room, which can make an instrument feel closer or farther away. A complete guide to balance will show you how these tools work together to build an immersive listening experience that pulls your audience in.
Common Mixing Mistakes to Avoid
As you get more familiar with your mixing software, it’s easy to fall into a few common traps. Knowing what these pitfalls are ahead of time can save you hours of frustration and help you get a cleaner, more professional sound much faster. Let’s walk through a few key mistakes and how to sidestep them.
Overprocessing Your Tracks
When you have a library of exciting plugins, the temptation to use them all is real. However, applying too much processing is one of the most common beginner mistakes you can make. Slapping a different compressor, EQ, and reverb on every single track often leads to a cluttered and unnatural sound that buries the song’s original vibe. Instead, try a “less is more” approach. For effects like reverb, use a single send or bus track. This allows you to apply the same effect to multiple instruments, creating a cohesive space for your song to live in.
Ignoring Gain Staging
Before you even touch an EQ or compressor, you need to get your levels right. This process is called gain staging, and it’s all about managing the volume of each track to make sure it’s not too loud or too quiet as it moves through your effects chain. If you skip this step, you risk digital clipping and distortion, which adds harsh, unwanted noise to your mix. Proper gain staging is a non-negotiable step for achieving a clean, balanced, and professional-sounding track. Check your levels first, and you’ll have a much better foundation to build upon.
Mixing Too Loud
It feels powerful to crank up the volume and feel the bass, but mixing at high levels for long periods is a recipe for a bad mix. It quickly causes ear fatigue, which clouds your judgment and makes it harder to hear details accurately. When the volume is too high, low-end frequencies can become especially difficult to control, resulting in a muddy sound where nothing has its own space. To avoid these common mixing mistakes, try mixing at a volume where you could comfortably have a conversation. Take frequent breaks to give your ears a rest, too.
How Do You Know When Your Mix Is Done?
It’s the question every artist asks: “Is it done?” The temptation to tweak one more fader is real, but chasing perfection can lead to an endless cycle of adjustments. A finished mix isn’t necessarily a “perfect” one. Instead, a finished mix is one that effectively translates the emotional energy of the song and is ready for the final mastering stage. So, how do you know when you’ve reached that point?
Instead of just listening on repeat in your studio, you need to check your work with fresh ears and a clear process. Two of the most reliable methods for judging your mix’s readiness are testing it on different sound systems and comparing it against professional reference tracks. These steps move you from your subjective bubble into the real world, showing you how your music will actually sound to your audience. By taking your mix on a little field trip, you can confidently decide if it’s ready or if it needs a few final touches before you export the final version.
Test Your Mix on Different Systems
Your studio monitors are designed to give you a flat, accurate sound, but almost no one else will listen to your music that way. Your audience will be hearing it through earbuds, car speakers, and laptop speakers. That’s why it’s essential to test your mix on various playback systems. This practice ensures your mix translates well across different listening environments.
Export your track and listen to it on everything you can: your phone, cheap earbuds, high-quality headphones, your car stereo, and a Bluetooth speaker. As you listen, ask yourself if the vocals are still clear, if the bass is overwhelming or nonexistent, and if any instruments sound harsh. This simple reality check will quickly reveal any balance or clarity issues you couldn’t hear in your studio.
Compare It to Reference Tracks
Using reference tracks is a vital step for checking your work against a professional benchmark. A reference track is a commercially released song in a similar genre that you think sounds amazing. By comparing your mix to these tracks, you can evaluate your overall balance, tonal quality, and dynamics. This isn’t about copying another artist, but about understanding the industry standard for your genre.
Choose one or two songs and import them into your project. Make sure to turn the reference track down to match the volume of your mix. Switch back and forth, paying close attention. How does your low end compare? Are your vocals as present? Does your mix feel as wide and exciting? This comparison provides valuable insights, helping you make informed adjustments to get a polished, professional sound.
Where to Learn More About Mixing
Once you’ve got the basics down, you’ll probably be hungry for more. Mixing is a deep and rewarding skill, and there’s always something new to learn, whether you’re a hobbyist or an aspiring professional. The good news is that there are tons of resources out there to help you continue your journey and refine your sound. From structured online courses to endless free tutorials, you can find the right learning style that fits your budget and schedule. Taking the time to learn from others is one of the best ways to develop your ear and discover new techniques that will make your tracks stand out.
Online Courses and Platforms
If you prefer a more structured learning path, online courses are a fantastic option. They guide you through concepts step-by-step, ensuring you build a solid foundation without missing crucial details. Platforms like Crossfader offer comprehensive packages that cover everything from beginner basics to advanced techniques, which is perfect if you’re serious about honing your skills. Many sites also offer discounts on their DJ and producer courses, making professional education more accessible. Investing in a course can fast-track your learning process and give you the confidence that you’re learning industry-standard practices from experienced professionals.
Free Tutorials and Resources
You don’t need a big budget to learn how to mix. The internet is filled with incredible free resources if you know where to look. YouTube is an absolute goldmine for tutorials on everything from setting up your software to mastering complex effects. You can find countless videos that walk you through specific programs like FL Studio or Rekordbox. Many software companies also offer free trials, so you can try out tools without any financial commitment. This is a great way to experiment and find what works for you. Getting comfortable with your software and learning how to organize your music library are foundational skills that these free resources teach very well.
Frequently Asked Questions
Do I really need expensive gear to start mixing? Absolutely not. You can achieve a fantastic mix with just a computer, a pair of decent headphones, and free software. The most important tools you have are your ears and your understanding of the fundamentals. Focus on learning how to use EQ and compression effectively before you even think about investing in pricey hardware. Great skills will always trump expensive gear.
My mix sounds muddy and cluttered. What’s the first thing I should fix? Muddiness is almost always caused by too many instruments competing for the same space, especially in the low and mid-range frequencies. The first tool to reach for is your EQ. Instead of adding more high-end to create clarity, try making small cuts in the frequencies of one instrument to make room for another. For example, carving out a bit of space in the bass guitar can help the kick drum punch through.
Is there a specific order I should apply effects like EQ and compression? While there are no unbreakable rules, a standard and effective workflow is to use EQ first to clean up and shape the sound. After that, apply compression to control the dynamics. This approach ensures your compressor is reacting to the sound you actually want, not to problematic frequencies you were going to remove anyway. Creative effects like reverb and delay are typically added near the end of the process.
How long should I spend mixing one song? There is no magic number, and it’s easy to get lost tweaking for hours. A good practice is to avoid marathon sessions. Work in focused blocks of one or two hours, then take a break to give your ears a rest. A mix is finished when it effectively serves the song’s emotional core, not when you’ve hit a certain time limit. If you find yourself making tiny changes that don’t improve the track, it might be time to step away.
Why is it so important to compare my mix to a reference track? Using a reference track is like having a professional benchmark right in your session. It grounds your mix in reality and helps you make sure your song will stand up against other tracks on a playlist. By comparing your work to a polished, commercial song in the same genre, you can get a clear sense of whether your bass is too loud, your vocals are present enough, or your overall mix is bright enough. It’s the best way to check your work and make sure you’re on the right path.